

How To Add A Google Sheet To Side Panel
Custom sidebar in Google Sheets
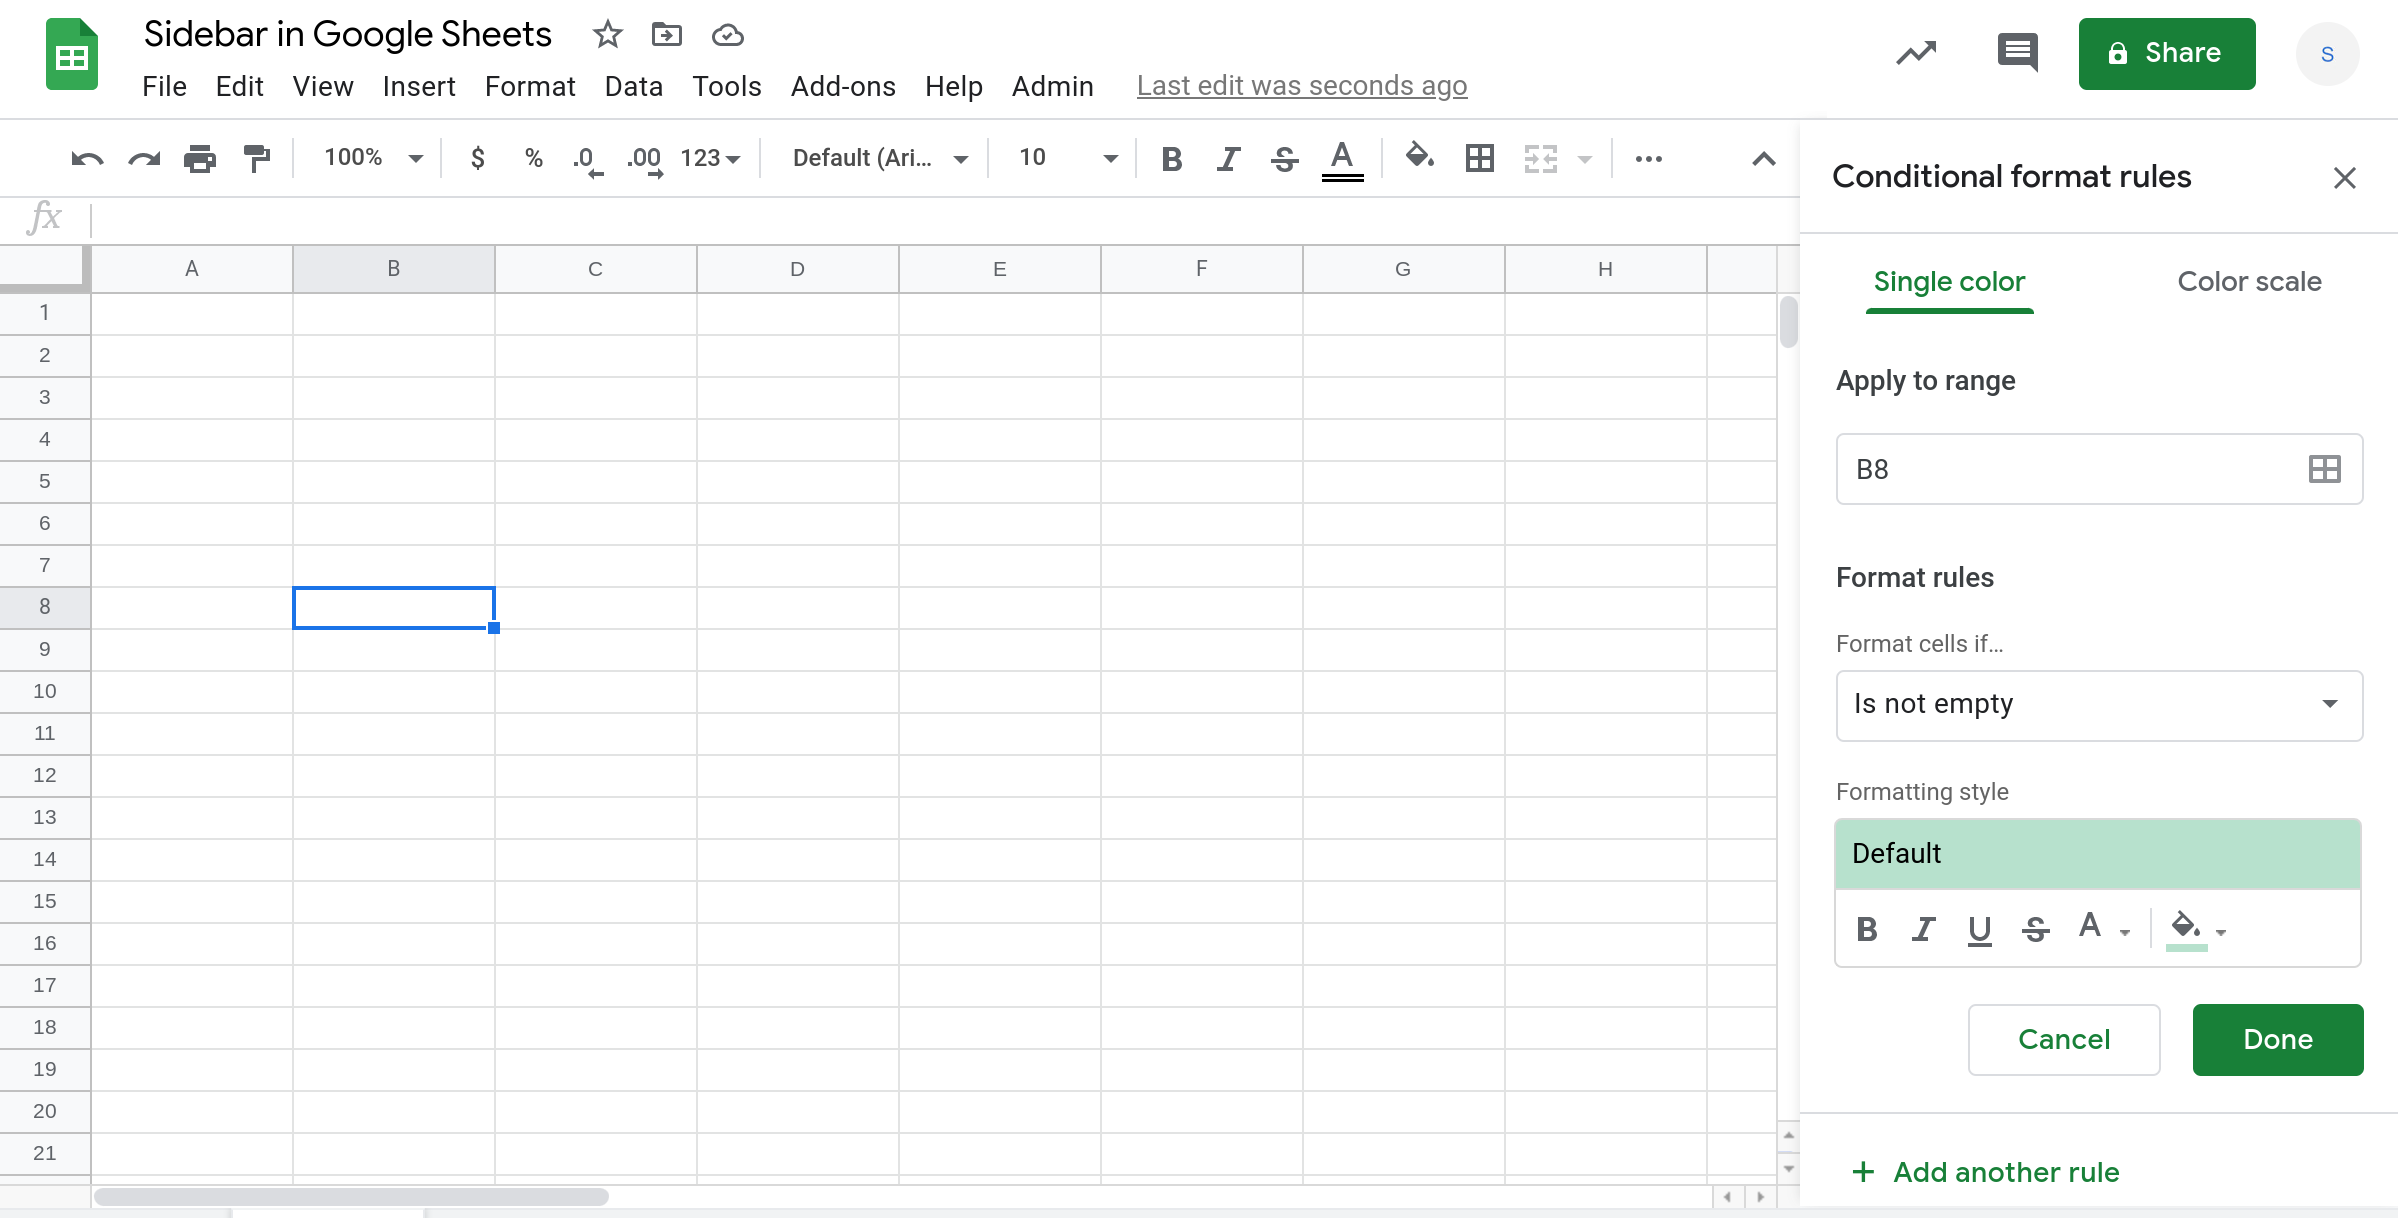
A Sidebar is a UI widget that appears on the correct hand side of Google Sheets. If you have added conditional formatting to your Google Sheets spreadsheet, you lot've seen sidebars in action.
You can build your own custom sidebars using Apps Script. These custom sidebars essentially enable you to build your own user interfaces inside Google Sheets and this tin can be very powerful. Here are a few examples of use cases for custom sidebars in Google Sheets:
-
Y'all tin build custom data entry forms or calculators using HTML, JavaScript and CSS and display them in a sidebar.
-
You can create a custom avant-garde formatting carte du jour for your spreadsheet.
-
You can integrate your spreadsheet with other applications using APIs (awarding programming interfaces). For example, yous tin query an external database and display this information in the sidebar.
-
etc.
In this tutorial, I will prove you lot how to create and use custom sidebars in Google Sheets using Google Apps Script.
Prerequisites
This tutorial assumes that you're familiar with the following concepts:
-
Basic coding concepts and the basics of coding using Google Apps Script
-
Custom menus in Google Sheets
-
Familiarity with bones HTML, CSS and JavaScript
-
Familiarity with Google Forms
What volition yous learn in this tutorial?
In this tutorial, you will learn how to:
-
Create a custom sidebar in Google Sheets using Apps Script
-
Set a custom championship for your sidebar in Google Sheets
-
Create a custom sidebar in Google Sheets using a HTML file
-
Use CSS and JavaScript to build custom user interfaces within a sidebar in Google Sheets
-
Close the sidebar manually or programmatically using Apps Script
-
Run Apps Script functions from the sidebar
-
Pass data from the sidebar to your Apps Script functions
-
Build data entry forms within custom sidebars in Google Sheets using Apps Script
-
Embed a Google Form within a custom sidebar in Google Sheets using Apps Script
Create a custom sidebar in Google Sheets using Apps Script
To create a custom sidebar, you need to write and run some Apps Script code. Custom sidebar widgets are congenital using HTML, CSS and Javascript.
The user must authorize creating the sidebar since this step involves running custom third-party lawmaking (i.east., lawmaking that was not written by Google). Therefore, yous cannot automatically display a sidebar. Instead, y'all can just display sidebars when users take some action similar clicking on a custom push or selecting a carte du jour item from a custom menu.
This is actually pretty uncomplicated to practice. In this tutorial we will create a custom sidebar that is displayed when users select a menu item from a custom carte.
Selecting the Admin folio menu item will display a custom sidebar.

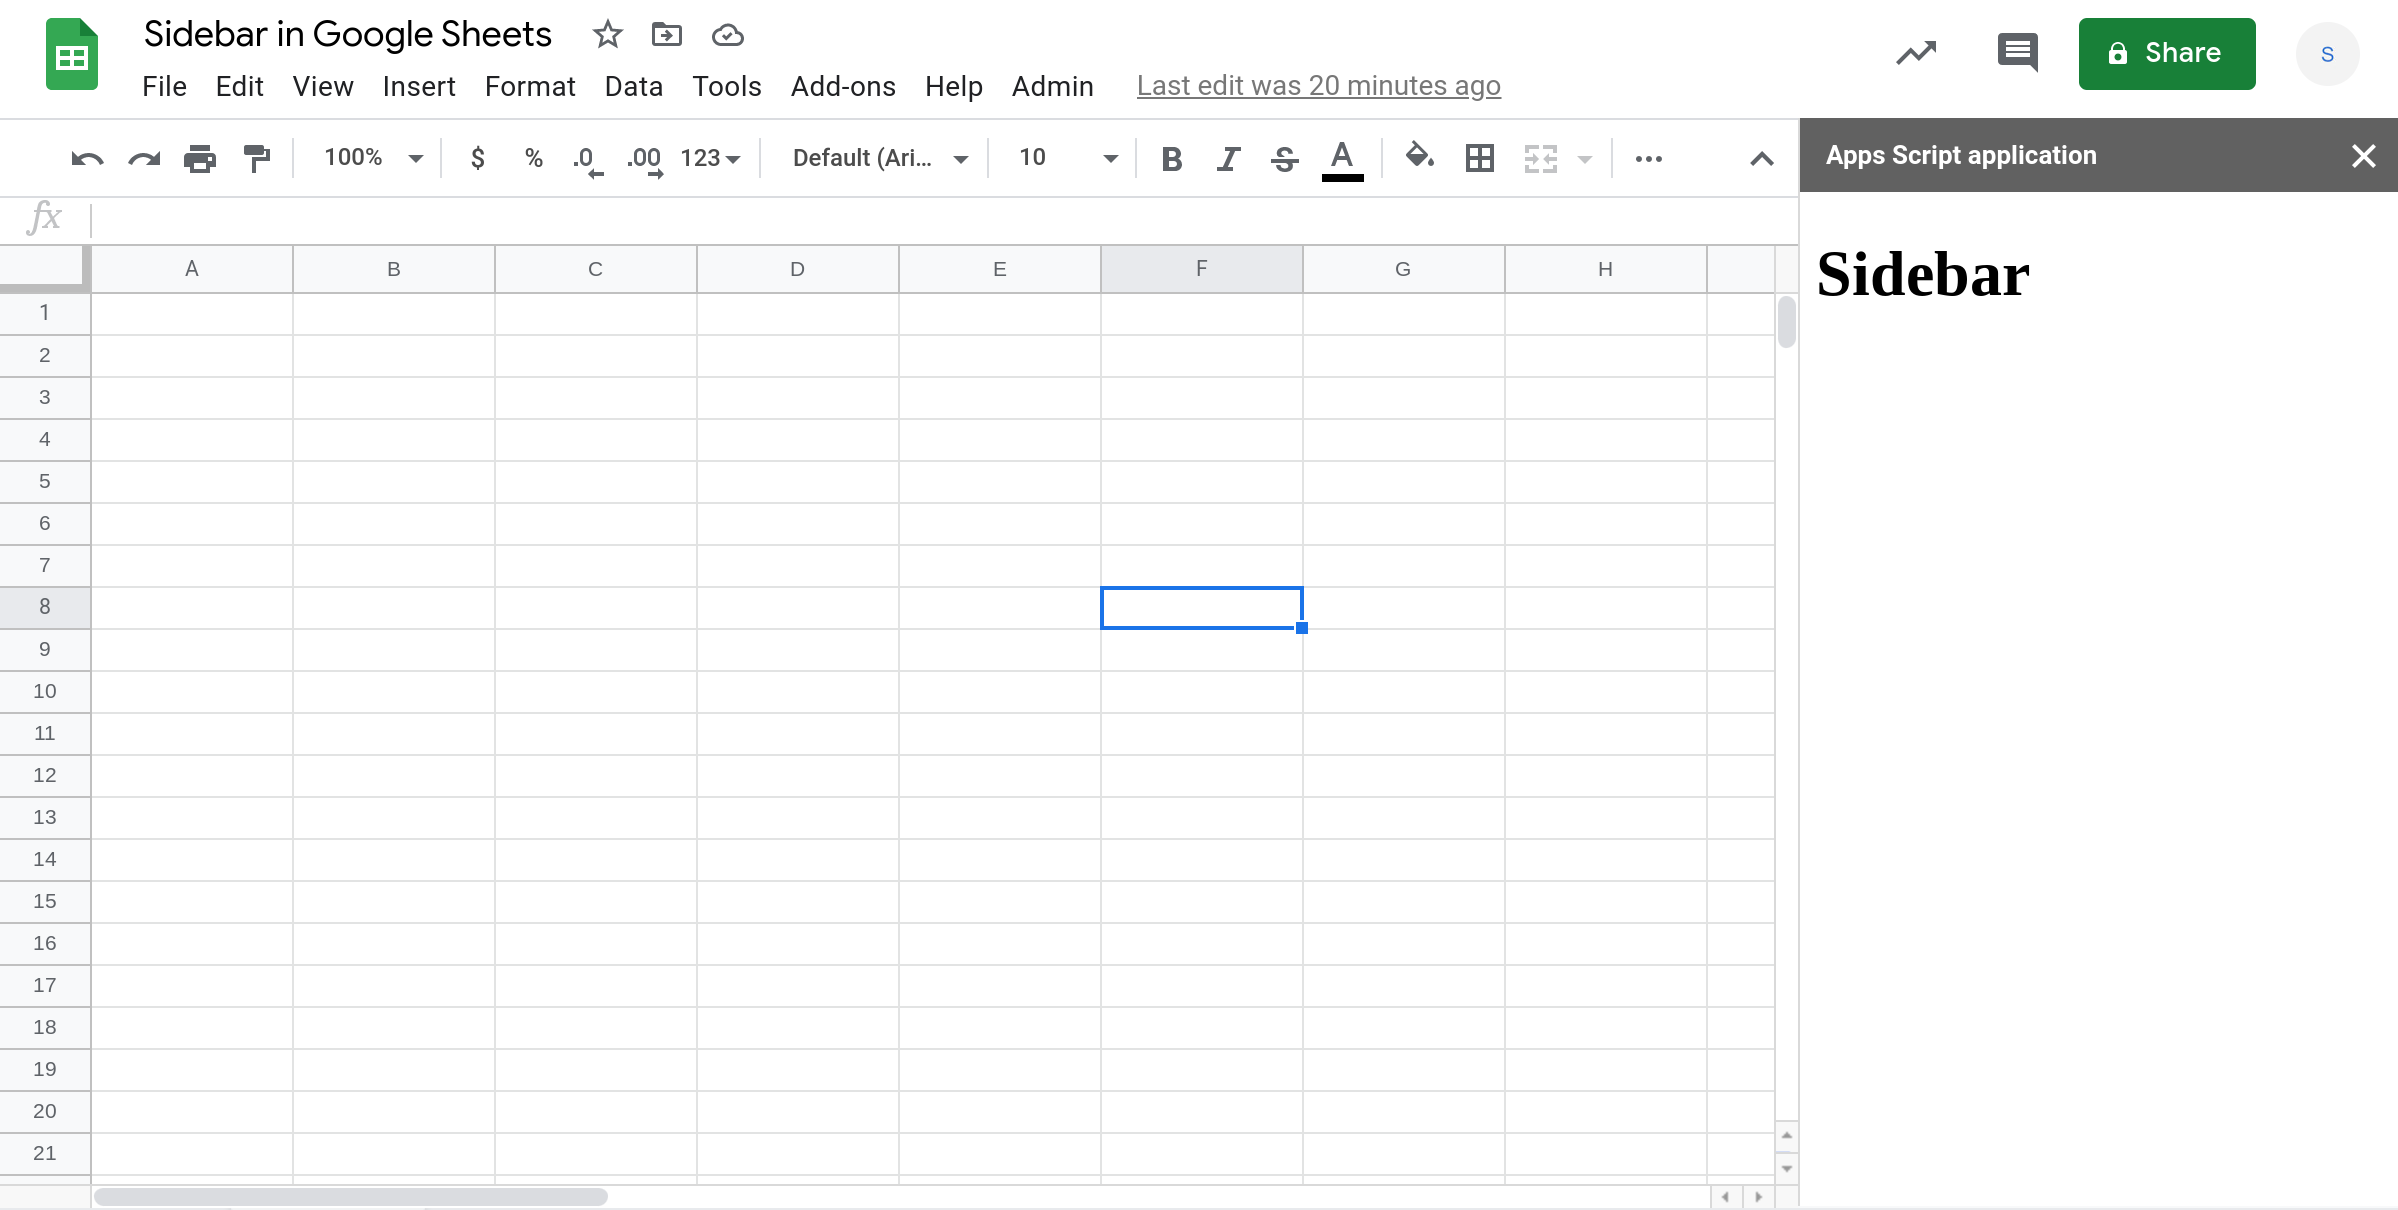
The lawmaking to create the above sidebar is pretty unproblematic. Kickoff, nosotros use an onOpen trigger that volition create a custom custom menu called Admin. This bill of fare has a unmarried card detail called Admin folio. When users select this bill of fare item, the part showAdminSidebar() volition be run and the sidebar will exist displayed. When you lot select the Admin page card particular the first time, Google volition ask you to authorize displaying custom widgets within Google Sheets. One time yous authorize it, the sidebar volition be displayed (sometimes you may demand to select the carte du jour item once again for the sidebar to be displayed).
//@OnlyCurrentDoc function onOpen() { SpreadsheetApp .getUi() .createMenu("Admin") .addItem("Admin folio", "showAdminSidebar") .addToUi(); } function showAdminSidebar() { var widget = HtmlService.createHtmlOutput("<h1>Sidebar</h1>"); SpreadsheetApp.getUi().showSidebar(widget); } The showAdminSidebar() function is too very uncomplicated. The first line creates an HTML widget and the 2nd line displays the sidebar with this widget. The HTML in this example is very simple but you tin can use avant-garde HTML and CSS too.
Setting a custom championship for the sidebar in Google Sheets
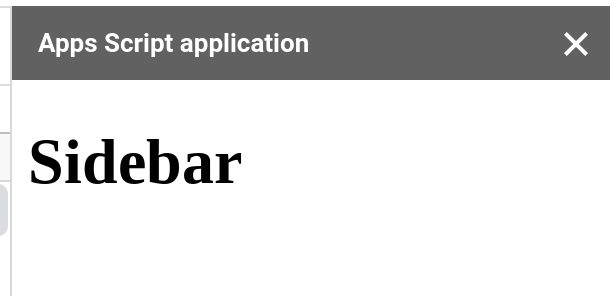
Past default, custom sidebars will have the generic title "Apps Script application".
To change the title, you need to set up the title of the HTML widget.
var widget = HtmlService.createHtmlOutput("<h1>Sidebar</h1>"); widget.setTitle("Admin page"); The showAdminSidebar() function later making the change to gear up a custom looks like this:
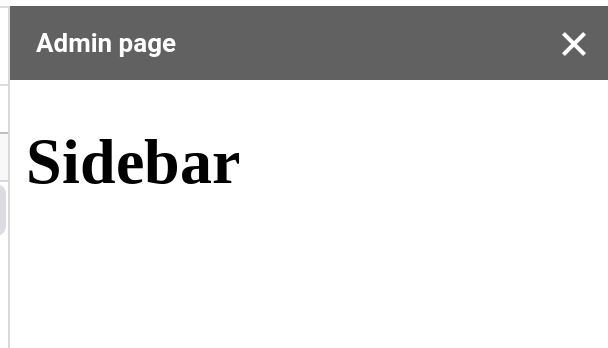
office showAdminSidebar() { var widget = HtmlService.createHtmlOutput("<h1>Sidebar</h1>"); widget.setTitle("Admin page"); SpreadsheetApp.getUi().showSidebar(widget); } When you close and reopen the sidebar, you'll see the new title "Admin page" displayed.
Create a custom sidebar in Google Sheets using a HTML file
While you lot can create sidebars using the HtmlService.createHtmlOutput() role, it can be cumbersome to practice so especially if your HTML code isn't small.
A better fashion to practise this is by creating a HTML file in the Apps Script editor and so using this file to create the sidebar.
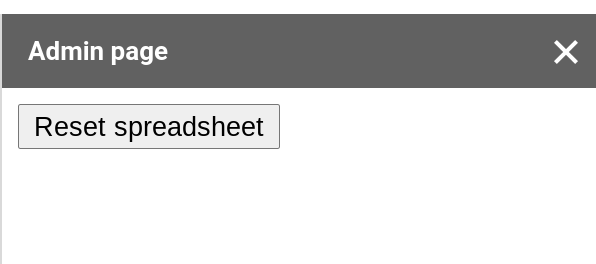
The kickoff stride is to create a HTML file. I'grand going to proper name the file Adminpage.
And then add the post-obit HTML code inside the <torso> section of the HTML.
<input type="button" value="Reset spreadsheet" onclick="alert('Spreadsheet reset');"> The above HTML code adds a push button that displays a JavaScript alert bulletin when information technology is clicked.
When you're done, the HTML file Adminpage.html should contain the post-obit code:
<!DOCTYPE html> <html> <head> <base of operations target="_top"> </head> <trunk> <input type="button" value="Reset spreadsheet" onclick="warning('Spreadsheet reset');"> </body> </html> Side by side, you need to use this HTML file when you create the HTML widget for your sidebar. In the showAdminSidebar() function, replace:
var widget = HtmlService.createHtmlOutput("<h1>Sidebar</h1>"); with:
var widget = HtmlService.createHtmlOutputFromFile("Adminpage.html"); When you're washed making changes, the full Apps Script code should expect like:
//@OnlyCurrentDoc function onOpen() { SpreadsheetApp .getUi() .createMenu("Admin") .addItem("Admin page", "showAdminSidebar") .addToUi(); } function showAdminSidebar() { var widget = HtmlService.createHtmlOutputFromFile("Adminpage.html"); widget.setTitle("Admin page"); SpreadsheetApp.getUi().showSidebar(widget); } At present close and reopen the sidebar. You should see the [Reset spreadsheet] button.
When y'all click the button, an alert message will appear.
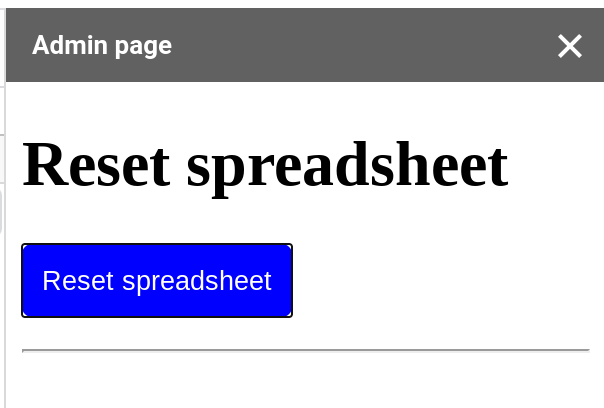
Use CSS and JavaScript to build custom user interfaces within a sidebar in Google Sheets
Since custom sidebars in Google Sheets can be created using a regular HTML file, you can utilise standard spider web technologies similar JavaScript and CSS to build rich sidebar widgets.
Here is an example of how to use JavaScript and CSS in the HTML code for a custom sidebar:
<!DOCTYPE html> <html> <head> <base target="_top"> <script> function displayAlert() { warning('The spreadsheet was reset successfully.'); } </script> <style> .button { background-color: blue; color: white; padding: 10px; border: none; edge-radius: 5px; } </fashion> </head> <body> <h1>Reset spreadsheet</h1> <p> <input type="button" class="push button" value="Reset spreadsheet" onclick="displayAlert();"> </p> <hr> </body> </html> In the above HTML, nosotros are using CSS to style the button and a JavaScript part called displayAlert() that is chosen whenever users click the [Reset spreadsheet] push button on the sidebar.
Shut the sidebar or programmatically using Apps Script
There are two ways to close the sidebar.
-
The user can manually close the sidebar past clicking X.
-
The sidebar can close itself programmatically.
To close the sidebar programmatically, use the google.script.host.close() JavaScript method from the sidebar's HTML code.
<!DOCTYPE html> <html> <head> <base target="_top"> </head> <trunk> <input type="button" grade="button" value="Close sidebar" onclick="google.script.host.close();"> </torso> </html>
Run Apps Script functions from the sidebar
It is too possible to run other Apps Script functions from the sidebar by using the google.script.run API from the sidebar'south HTML file.
As an case, permit us create a simple Apps Script part called displayToast() that will brandish a toast message.
function displayToast() { SpreadsheetApp.getActive().toast("Hi there!"); } So, call this function from the sidebar HTML code using JavaScript. Notice that the onclick attribute of the button calls google.script.run.displayToast().
<!DOCTYPE html> <html> <head> <base target="_top"> </head> <body> <input blazon="push" class="push" value="Display toast" onclick="google.script.run.displayToast();"> </body> </html>
Pass data from the sidebar to your Apps Script office
You tin can too pass data from the sidebar to an Apps Script function. Below is an example of how to practise this. The HTML file has a text box where you can enter your name and this value is passed to the displayToast() Apps Script role that displays a Toast message using the proper noun that you entered.
Here is the code for the HTML file:
<!DOCTYPE html> <html> <head> <base target="_top"> </head> <script> office displayToast() { var proper noun = certificate.getElementById('proper name').value; google.script.run.displayToast(name); } </script> <body> What is your name? <input type="text" id="name"> <br> <input type="push button" class="push" value="Display toast" onclick="displayToast();"> </body> </html> The displayToast() JavaScript function in the in a higher place HTML file runs the displayToast() Apps Script function (below) and passes the name value to it. The Apps Script function and then displays a Toast message with this name.
office displayToast(proper noun) { SpreadsheetApp.getActive().toast("Hi " + name + "!"); } Build data entry forms within custom sidebars in Google Sheets using Apps Script
A common use case for custom sidebars in Google Sheets is making it easier to enter data into the spreadsheet with custom validation logic. Maintaining the consistency and quality of data in spreadsheets over time is difficult to do. Nonetheless, at the aforementioned fourth dimension, this is disquisitional since otherwise you might be making incorrect decisions. Poor decisions upshot from wrong input data.
One way to increment the quality of information in spreadsheets, specially if this data will exist entered manually from printouts or other physical media, is using a custom form to facilitate information entry.
Using a class to enter information has several benefits. Yous tin add together custom validation rules to catch errors during information entry and you can also build some automation to increase the efficiency of information entry. For example, you can intelligently pre-fill some fields based on the data beingness entered into other fields in the form.
Since sidebars support custom HTML, CSS and JavaScript code, you can also build custom data entry forms equally a sidebar widget in Google Sheets.
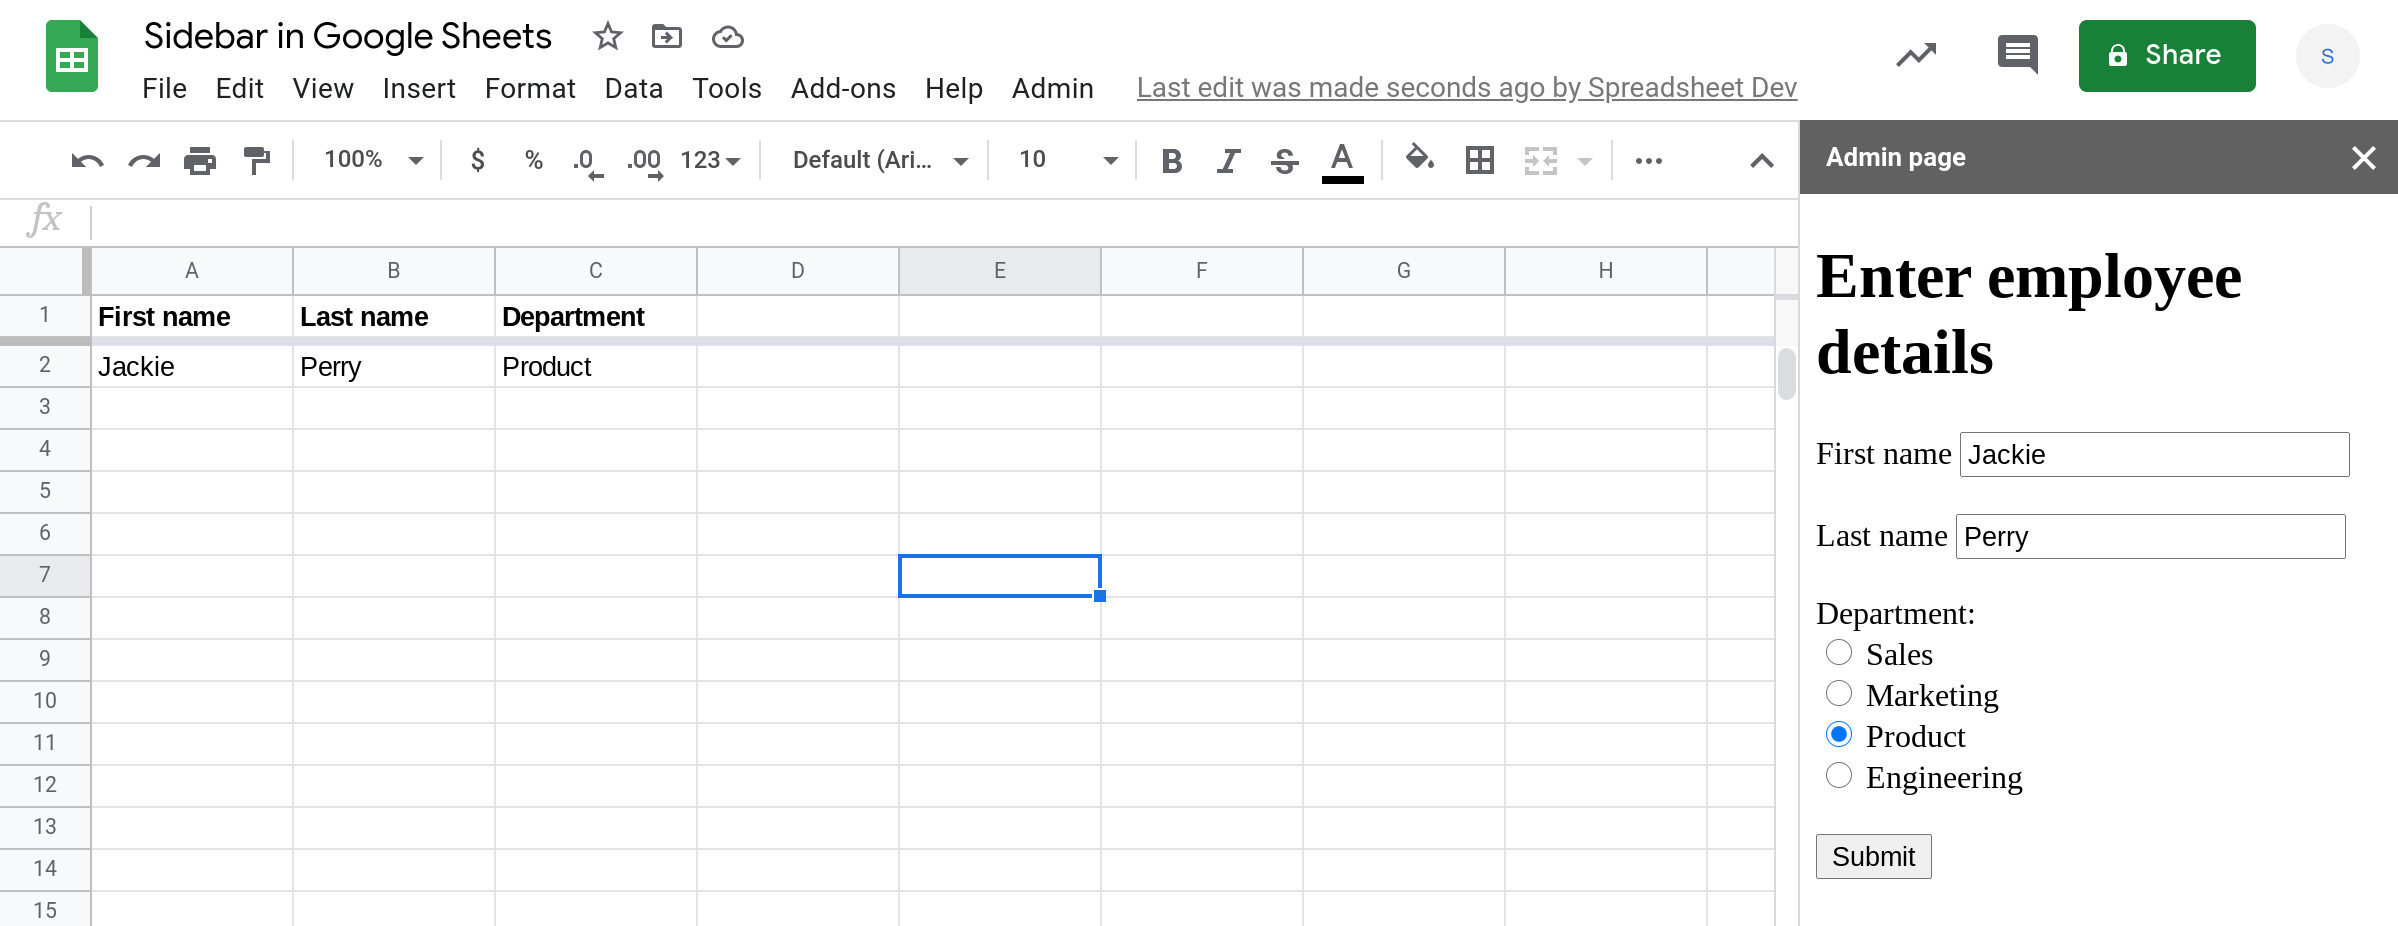
Below is the HTML code for a simple class that lets users enter some bones information about employees. The form has 2 text fields for outset and last name and a radio push group for the employee's department.
<!DOCTYPE html> <html> <head> <base target="_top"> <script> part submitForm() { google.script.run.appendRowFromFormSubmit(document.getElementById("employeeForm")); } </script> </head> <body> <h1>Enter employee details</h1> <form id="employeeForm"> <label for="firstName">First name</label> <input type="text" id="firstName" proper name="firstName"><br><br> <characterization for="lastName">Last name</label> <input type="text" id="lastName" name="lastName"><br><br> <div> <label for="department">Department:</characterization><br> <input type="radio" id="sales" proper noun="department" value="Sales"> <label for="sales">Sales</characterization><br> <input type="radio" id="marketing" name="section" value="Marketing"> <label for="marketing">Marketing</label><br> <input blazon="radio" id="product" name="department" value="Product"> <label for="product">Product</characterization><br> <input type="radio" id="technology" name="section" value="Applied science"> <label for="engineering">Engineering</label><br><br> <input type="button" value="Submit" onclick="submitForm();"> </class> </torso> </html> When you click [Submit] the JavaScript function submitForm() is called and this in turn runs the Apps Script function appendRowFromFormSubmit() and passes the form object to it.
The appendRowFromFormSubmit() and so appends a row to the spreadsheet with the data entered in the form.
function appendRowFromFormSubmit(form) { var row = [form.firstName, form.lastName, form.section]; SpreadsheetApp.getActiveSheet().appendRow(row); } The full Apps Script code for this example is:
//@OnlyCurrentDoc part onOpen() { SpreadsheetApp .getUi() .createMenu("Admin") .addItem("Admin page", "showAdminSidebar") .addToUi(); } function showAdminSidebar() { var widget = HtmlService.createHtmlOutputFromFile("Form.html"); widget.setTitle("Admin page"); SpreadsheetApp.getUi().showSidebar(widget); } function appendRowFromFormSubmit(form) { var row = [course.firstName, form.lastName, form.department]; SpreadsheetApp.getActiveSheet().appendRow(row); } Here is a video that shows the custom form in a sidebar in Google Sheets. This can be a simple and effective way to streamline data entry processes at your organization.
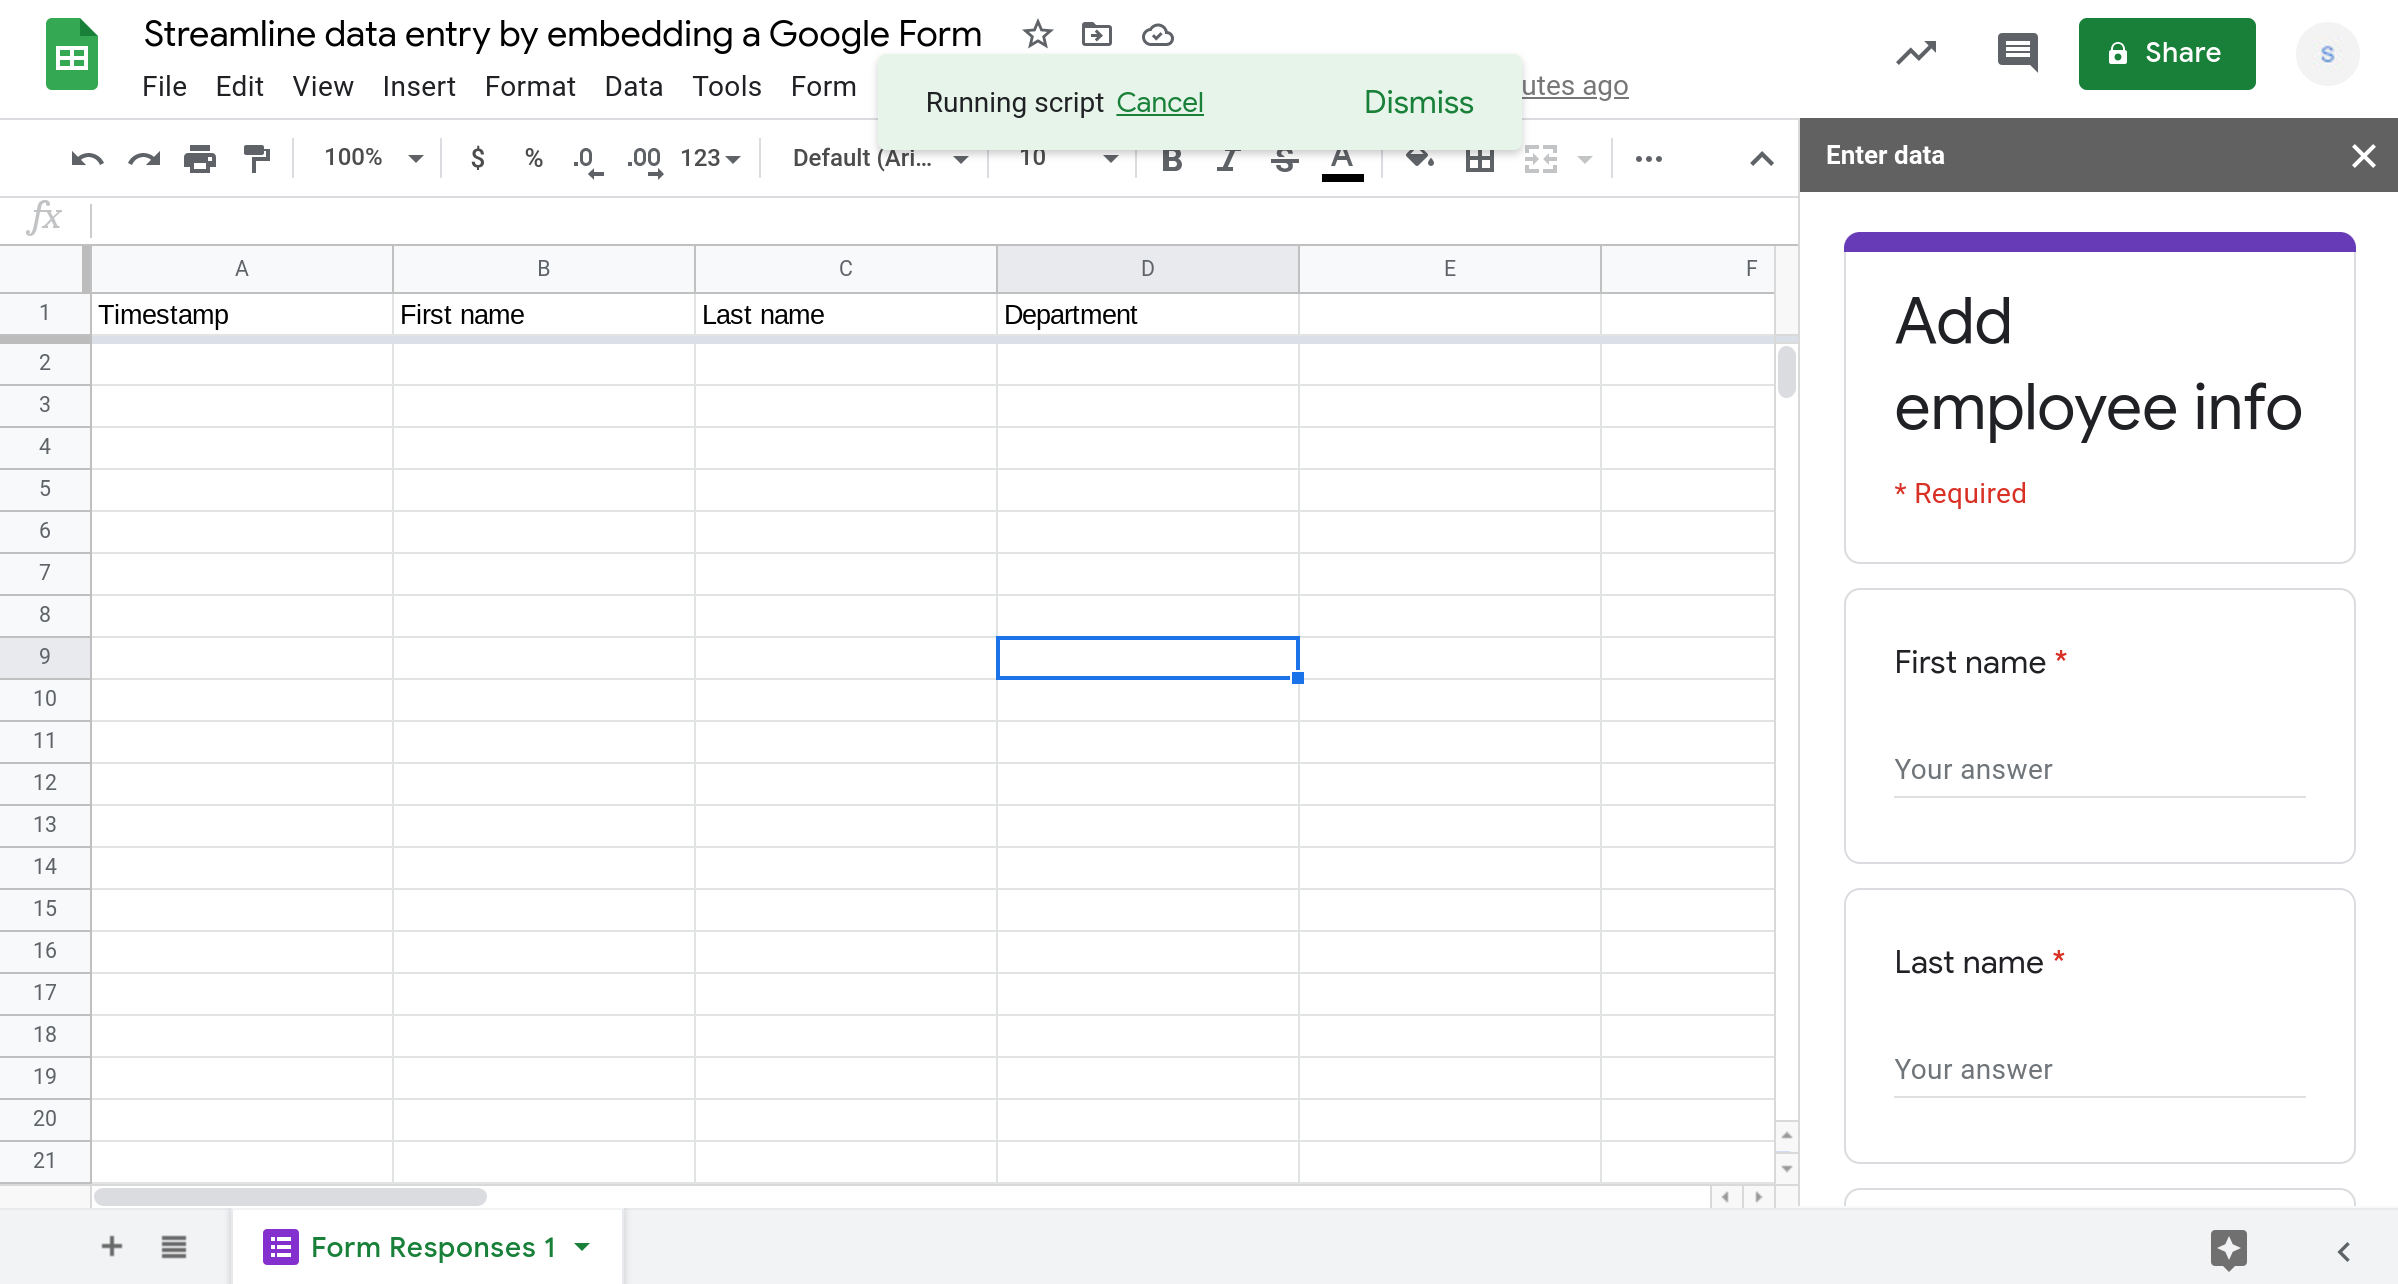
Embed a Google Form within a custom sidebar in Google Sheets using Apps Script
Instead of building a information entry form using HTML, CSS and JavaScript, you can just create a Google Form and embed it in a custom sidebar. Please see the following tutorial for more information on how to do this: Streamline data entry past embedding Google Forms in Google Sheets using Apps Script.
Decision
Custom sidebars enable yous to build custom user interfaces in Google Sheets using Apps Script. In this tutorial you learned how to create and use custom sidebars in Google Sheets. Specifically, y'all learned how to:
-
Create a custom sidebar in Google Sheets using Apps Script
-
Fix a custom title for your sidebar in Google Sheets
-
Create a custom sidebar in Google Sheets using a HTML file
-
Use CSS and JavaScript to build custom user interfaces inside a sidebar in Google Sheets
-
Close the sidebar manually or programmatically using Apps Script
-
Run Apps Script functions from the sidebar
-
Pass data from the sidebar to your Apps Script functions
-
Build data entry forms within custom sidebars in Google Sheets using Apps Script
-
Embed a Google Form within a custom sidebar in Google Sheets using Apps Script
Thank you for reading!
Stay up to date
Follow me via email to receive actionable tips and other exclusive content. I'll also transport yous notifications when I publish new content.
By signing up you lot agree to the Privacy Policy & Terms.
Have feedback for me?
I'd appreciate any feedback you can requite me regarding this postal service.
Was it useful? Are there any errors or was something confusing? Would yous like me to write a post about a related topic? Any other feedback is besides welcome. Give thanks you lot so much!

How To Add A Google Sheet To Side Panel,
Source: https://spreadsheet.dev/custom-sidebar-in-google-sheets
Posted by: carterdianow.blogspot.com
0 Response to "How To Add A Google Sheet To Side Panel"
Post a Comment